
Do you know how to use a waterbrush? They are also called water brush pens, watercolor brushpens, and a few other names. Whatever you call them they are amazing. However, they can also be hard to use. In this article, and in this video I share some tips from over ten years of using waterbrushes including some advanced techniques and questionably hygienic practices.
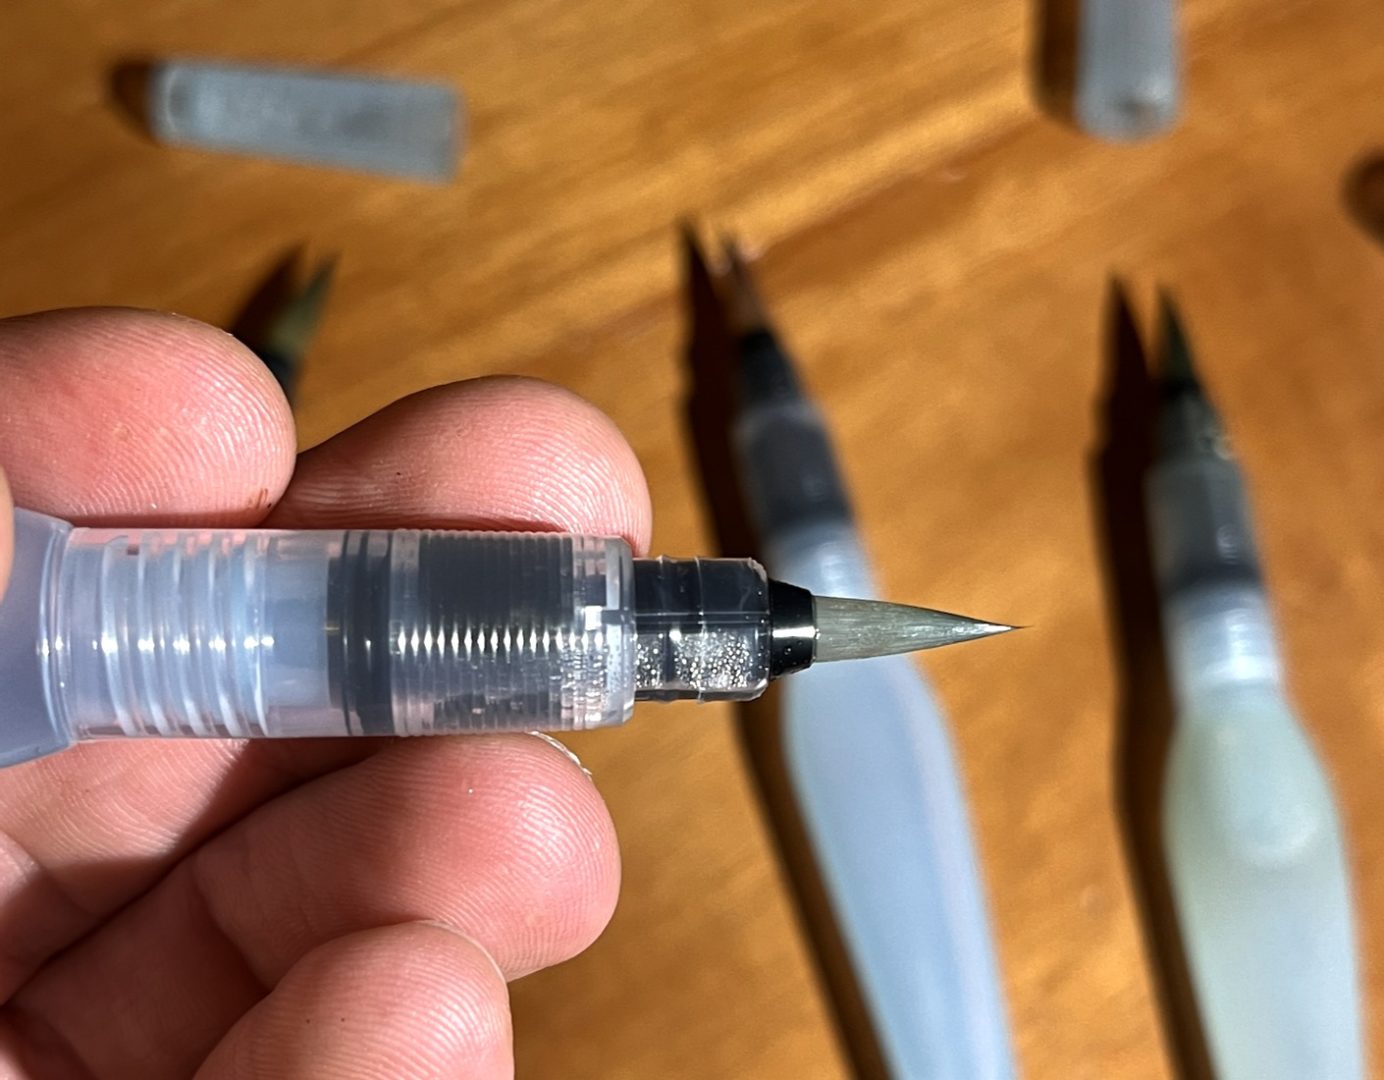
What even is a waterbrush? Just in case you got to the party late a waterbrush is a contraption that looks like a hollow plastic paintbrush with a reservoir for water. Instead of dipping in water you can squeeze the brush to release more water when you need it. This makes them much more portable and easy to use in the field. Unfortunately, they do not come in squirrel eyelash versions like traditional brushes. Also, unlike traditional brushes there are no $500 dollar ones.
How to Use a Waterbrush: 9 Tips
Which one should I get?
- First, there are a few things you should know about choosing waterbrushes. I prefer brand leader Pentel, so I will focus on those. However, each year there are more companies to choose from. Within each brand there will be different sizes and perhaps shapes. I recommend getting a mixture of sizes to start with so you can find what works best for you.Here is a set that I like. I use size large almost exclusively.
- Size will influence partly in water control which is the main issue that newbies tend to have with waterbrushes.
- Size has a smaller influence on details because most waterbrushes have a very fine tip.
- There are some flat tip waterbrushes. Here is the one by pentel.
Too much water is coming out!
- Once you have chosen your waterbrush the next biggest challenge is water control. Lots of beginners give up here. Too much water comes out and they struggle especially with precision.
- Regardless the flow will slow with time as sediments or organic matter start to build up in the reservoir and membrane.
- Here are some solutions I recommend.
- Get a smaller size which can help some.
- Adapt your style for a while and get used to the extra water flow.
- Work bigger to compensate.
- Wait until the flow slows.
- Use a two brush system. See the video for more details.
- Intentionally slow the flow by introducing bacteria to the reservoir.
- One other approach is to use a rag or towel to suck of water near the top of the bristles.
Filling and cleaning…
- While they are generally more convenient in the field, these nifty brushes can be tricky to refill. But you can be trickier with these techniques.
- Use a small syringe such as these: these small plastic ones With these nifty tools you can easily suck water from your waterbottle and insert it into the water brush.
- Pouring straight from your water bottle probably won’t work because the opening of the brush is too narrow. However, if you have no other choice squeeze the reservoir slightly and then unsqueeze it as you pour the water. This will create some suction.
- Use your mouth. See the video for more about this.
- Cleaning is going to be essential. I recommend regularly rinsing with white vinegar. Not your mouth but the waterbrush reservoir. Make sure to squeeze the cleaning solution through the bristles and rinse afterwards. You can also try using only filtered water.
Switching tops!
This technique is good to know about. While it is slightly advanced it will give you options. You might run out of water in the field and one of your brushes is better than the other. Just unscrew the top and switch the reservoir.
How to do a continuous wash and mix colors with a waterbrush.
I think it is easier to do continuous washes and graded washes with a waterbrush than with a traditional brush. It is even more intuitive. However, if you still need help then check out that part of the video. Mixing colors is also easier because the brush is very easy to clean and it is easy to add clean water to the wash in the mixing area.
Two brush technique for ninjas only.
If you are an advanced or ambitious watercolor ninja then you can try this technique. I copied it from acrylic and oil painters who are required to use multiple brushes at the same time. All you have to do is remember which is which. Basically, you choose the main colors in a painting and dedicate a brush to warm/pale or cool/dark. This way you don’t have to clean the brush every time you need to change color. Does that make sense? If not watch the video.
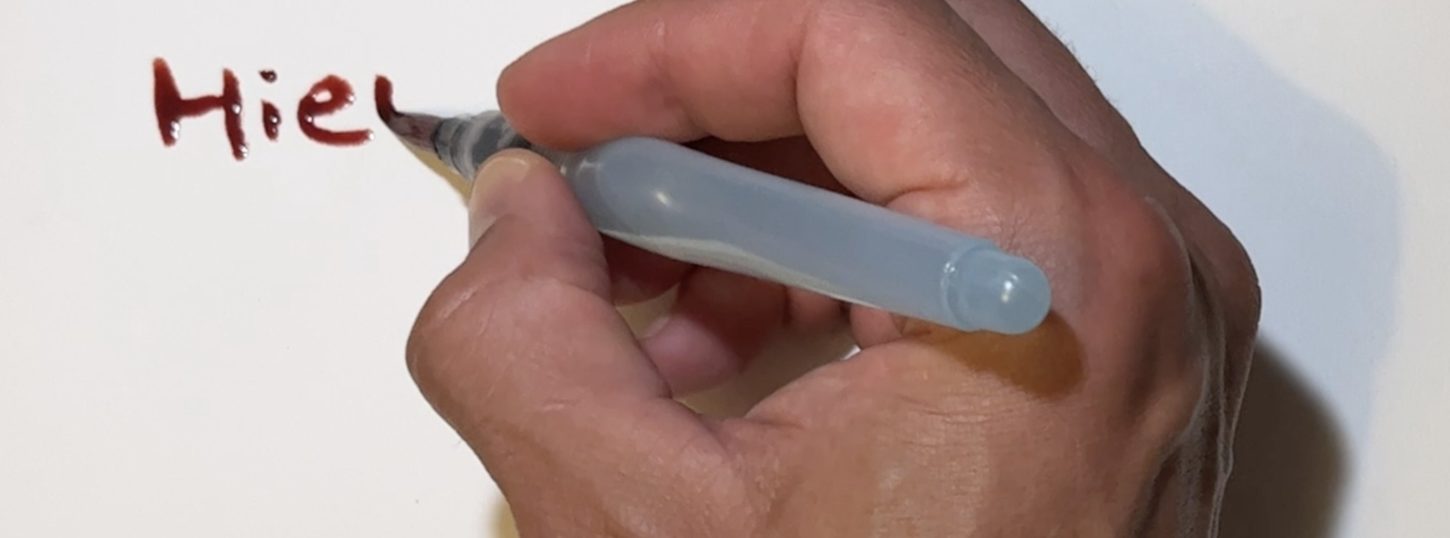
How to use a waterbrush filled with ink?
You might have noticed that there are brushpens on the market that come with different color inks in them. They are cool but even cooler would be to make your own. You can easily use the waterbrush that is designed for watercolor and fill it with any ink of your choosing. In the video you can also see how I mix a a nice purple watercolor wash in my palette and use a syringe to put it inside the brush. Now you can use it for creative lettering, for borders, or for large areas of a single color.
Main Differences Between Waterbrushes and Traditional Watercolor Brushes
- You don’t have to carry a water container for waterbrushes.
- There are no waterbrushes made from Siberian sable belly-button hairs.
- There are fewer types and sizes of waterbushes to choose from.
- You can’t find no $600 waterbrushes.
- You can’t easily do dry brush techniques with waterbrushes.
- Waterbrushes aren’t as sexy looking.
- Waterbrushes are not as good for lifting techniques.
But what if I’m completely new to nature journaling?
One of the great things is that you don’t need to be an expert at nature journaling to get started. In fact, there are many benefits of nature journaling while you are a beginner. Nature journaling is focused on learning not knowing. The main enemy of learning is not ignorance but the illusion of knowledge. However, it might take some practice because this is not how most people think. The best place to start is “I notice, I wonder, it reminds me of.” Let et curiosity be your guide.
Regardless of your experience, we got you right here. Below are links to some super resources for beginner nature journalers.
Are you just getting started with Nature Journaling?
Here are tips and motivation for beginners.

2 Responses
That was helpful to learn that the water does not flow through the bristles, and having two brushes for their reservoirs is a good idea!
Hi Sandy, these brushes are very interesting. I feel like I learn something new about them all the time. Some of the quirks about the design are not great but so far they are the best option that I have found for me. Having two brushes is a bit of a work around solution but seems to help.